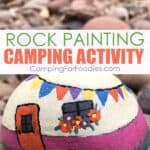
Camping Painting Activity Rock Painting Craft Project
Camping Activities: Camping Painting Activity Rock Painting Craft Project
Yield: 1 Painted Rock For Each Rock Gathered
Cost: $1
Equipment
- Paintbrushes
- Cup (for water to rinse paintbrushes)
- Paper Towels
Materials
- Rocks
- Acrylic Craft Paint
- Water for rinsing brushes
- Sharpies optional
- Paint Pens optional
- Spray-On Enamel Sealer optional
- Stencils optional
- Camping Clip Art optional
Instructions
- Gather small rocks around the campsite or on hiking trails. It is easiest to paint smooth and flat rocks but keep in mind your particular design so you can look for a shape that fits your design like we did with our retro camper painted rock.
- Wash the dirt from the rocks using plain water or soapy water with a scrub brush, if necessary.
- Allow rocks to fully dry.
- Determine if you want to seal or prime the rock before painting your design. Very porous rocks may soak up lots of paint (especially if you are using paint markers) so it is best to add a sealer to the clean rock, then let it fully dry before painting your design. Dark colored rocks may make light colored designs look dingy so it is best to prime the rock with a coat of white paint, then let it fully dry before painting the design.
- Paint your design on the rock. Apply several coats, if necessary, allowing the paint to dry between layers. Use acrylic craft paint or oil based paint markers.
- Camp Crafting Tip: As you are painting your design while the paint is still wet, you can use a corner of a wet paper towel to remove any “mistakes” before they dry.
- Let the design fully dry before writing any words on the rock using a paint brush, an oil based paint pen or Sharpie.
- It is optional to seal the painted rock using a clear enamel spray sealer applying multiple light coats to get good coverage without drips.